
Home security camera (system) installation issues keep popping up. Drilling holes, running wires and cables inside and outside an apartment may freak you out. Not to mention, the CCTV security camera (system) installation cost in US, Australia, Canada, India, etc. if you ask for professional home surveillance companies. Here are expert instructions on how to install wired and wireless home security cameras in your home.
Table of Contents:
- CCTV Cameras & Systems Installation Preparations
- DIY Wired & Wireless Video Cameras Installation Steps
- Installing Security Cameras Inside & Outside Conclusion
Here is the key information to install home security cameras in this article:
| Camera Types | Wireless/PoE cameras |
| Preparations | Decide where to install |
| How to Install | 5 steps |
| Recommended Camera | Reolink security cameras |
DIY Home Security Camera Installation Preparations
Before you start a video surveillance project by yourself, whether it is a wireless security camera or a PoE IP camera, there're several things you need to prepare and plan ahead.
#1. Know Exactly What Types of Home CCTV You'll Set Up
The installation process varies according to different types of video surveillance cameras and systems.
Wired vs. wireless security camera, which one to choose? It depends on your specific security needs. Get WiFi security cameras, especially battery powered cameras, for flexibility and easier installation, while going for wired PoE IP cameras for more stable network signals.
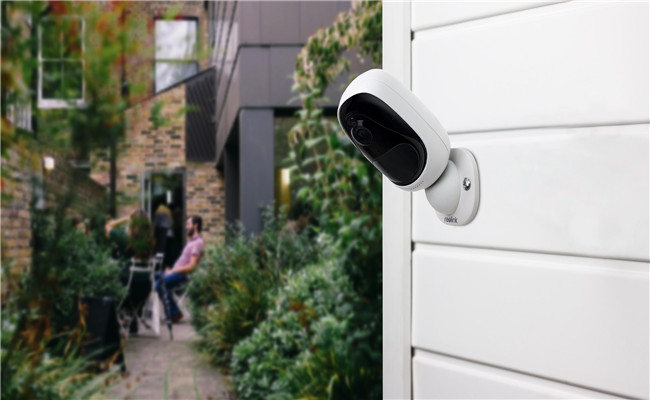
The battery-powered security camera is definitely your best choice, if you'd like to get rid of messy cabling and drilling, especially when installing cameras outside an apartment door/window (the outside is brick). ”100% wire-free” means no cords, and no wiring needed from top to bottom. You can feel free to place it anywhere, indoor and outdoor, on a shelf, table or mount it on the wall without running wires.

Ready. Set. Save!
Big selection, big SAVING. Get your hands on Reolink security cameras & systems before the best prices slip away!
Further Reading: Learn how to pick the right CCTV surveillance camera and figure out a home surveillance solution you need most.
#2. Decide Where to Install Indoor & Outdoor Security Cameras
Knowing where to place your home security cameras determines whether you can maximize the effectiveness of your camera. Front door, back door and off-street window are the best locations and positions suggested by security experts.
#3. Prepare CCTV Installation Tools & Materials for a Smooth Installation
Generally, tools needed for installation include screws, anchors, cables, a power adapter or receiver, an electric drill and others. If you get an all-in-one security camera (system) (Reolink highly recommended), screws-kind-of necessary installation materials are usually included in the camera box.
How to Install Wired & Wireless Home Security Cameras & Systems by Yourself
Before you read this part, you can watch the video to take a quick guide to install a security camera:
Setting up a do-it-yourself video surveillance system for home is not as complicated as you thought. The following 5 easy steps will make mounting both wired and WiFi home cameras a breeze, even if you are building your own home surveillance system for the first time.
Editor's Note: For a wireless home video camera, I suggest you configure its WiFi settings before you start mounting it inside and out, while for a PoE IP camera, there are no strict rules for which comes first.
Step 1. Check for Spots Where Cameras Get a Clear View and Stable Power Source
This is the first important step in self installation of home surveillance systems. Pay attention to the following details when you decide the areas where you'd like to place the camera:
- Mount your camera up high, to make sure it gets a clearer and wider view. Cover as many entries as possible using the least number of cameras to save cost.
- Place the security camera in a place that is out of reach of home intruders and thieves, or naughty kids.
- Avoid pointing your camera directly to a light source. Pointing towards the light source would result in a slight underexposure of videos and images captured.
- Put cameras near a power source. Even a wireless video camera need power supply.
- Place the required mounting bracket for the camera under the eave. This helps protect outdoor security cameras from severe and changing weather.
- It is best not to install a security camera below windows. Or else, the IR reflection may lead to overexposed images and videos (click here to learn more).
- Avoid installing your security cameras to your neighbors' properties, bathrooms, or places where people shall enjoy a reasonable expectation of privacy.
Step 2. Mount Your Home Security Cameras on the Wall
Drill holes to screw your camera on the wall, ceiling, and other spots you've determined for the camera mounting. And then point your camera in the right position and right angle. Always remember to make sure it provides the best motion detection when positioning your security camera.
Security cameras coming in an all-included package, say, Reolink PoE dome/bullet IP cameras, provide mounting brackets, and screws. Make the most of the mounting hole template to make your first-time video security installation much easier.
Here comes a CCTV camera installation video, providing step-by-step instructions on mounting a dome security IP camera.
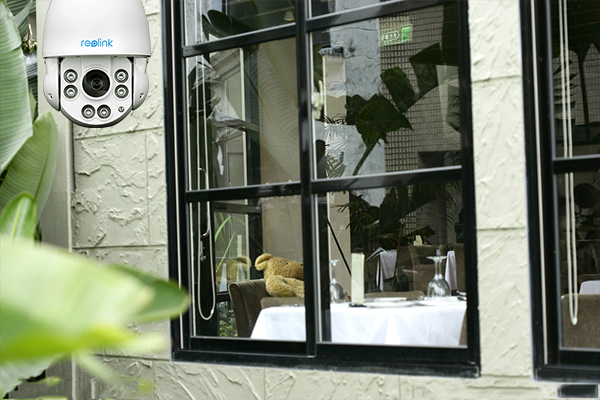
If you are installing a PTZ IP camera, another key step is the vertical bracket installation. Get to know more about how to install vertical bracket of RLC-423, the most powerful high speed dome PTZ IP camera.
Step 3. Arrange Wires and Cables for CCTV Camera Installation
It seems that the most difficult part of CCTV installation is to run security camera wires and cables.
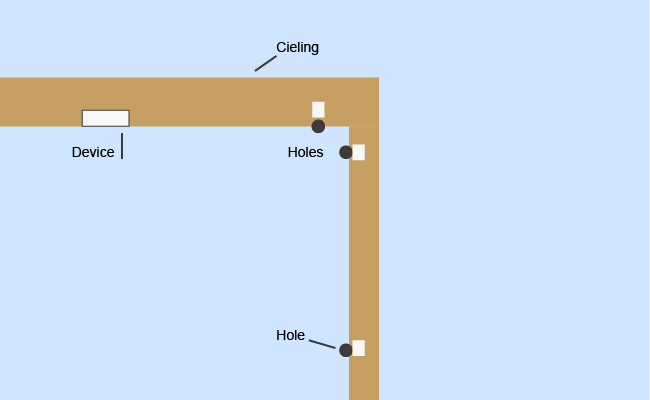
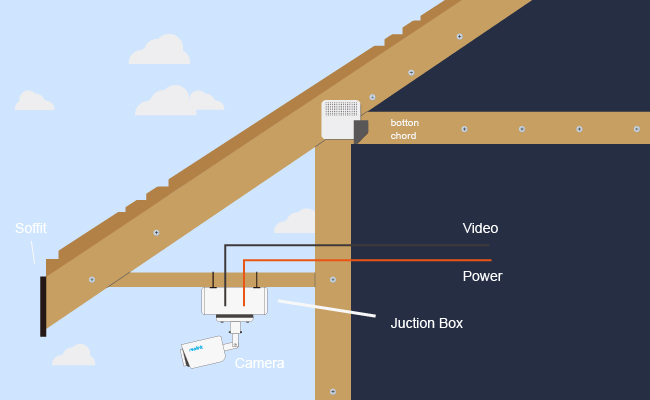
Before you get started, you should plan the security camera wire route, especially when you plan to install cameras in multiple spots, such as, in hallways, basement, garage, through the attic, under the eave, in ceiling soffit.
Drill holes where the wires will go through, and consider the nearest route if you are doing the installation in a two or three-story house. Push all of the ends of the camera cables on the holes you have drilled. This way, you can conceal the wires and prevent them from wearing out. You can also choose a room wherein you want all your cables to be placed.
Each of the cable wires also consists of two wires with their connectors. One of the wires is intended for the good power supply. The other one is also intended for the video recorder. For the power supply, you can either create a single power source for the wires or plug each of them on different sockets. Once the wires for view recording have been connected to the DVR/NVR recorder, it will now be connected to the monitor. This is where you can see all of the images captured by the cameras.
The following article includes all the details on installing security camera wiring in the house and outside: how to run security camera wires, for both experienced CCTV camera installers and green hands.
Editor's Notes:
- If you are choosing a wired security camera, get a PoE wired one. A PoE network cable provides both video and power transmission, making DIY installation of PoE wired IP camera much easier.
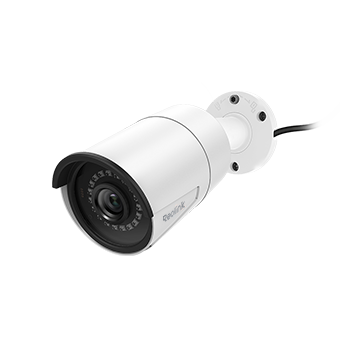
Reolink RLC-410
PoE Bullet IP Security Camera with Audio
5MP/4MP Super HD; Outdoor/Indoor Protection; 100ft Infrared Night Vision; Audio Recording; Mobile Remote Access & Control.
- If your camera uses DC power adapter, it means you'll need a power outlet near the camera source. It may be ”simpler for you to plug in the power supply inside, and simply extend the low voltage wire out to the camera location”. (Professional suggestion from an experienced CCTV installer.)
Also note that it is important to conceal security camera cable and holes from the sight after you arrange the cables.
Here are some practical tips for your reference:
• Fill the holes with waterproof materials like silicone and duct seal.
• Apply waterproof outdoor covers or feed-through bushings to conceal the holes.
• Use junction boxes to hide the cables, connectors and the holes.
• Use a plastic tube to conceal the CCTV camera wires.
Click here to find more useful ways to hide security camera cables indoors & outdoors.
Step 4. Connect Home Surveillance Cameras and Power Them on
After the wiring process, the next step is to connect your home CCTV system, and check if it can successfully get the power supply.
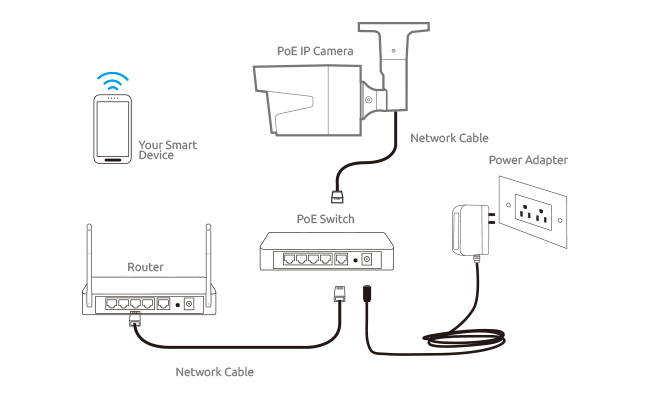
- PoE security camera connection diagram:
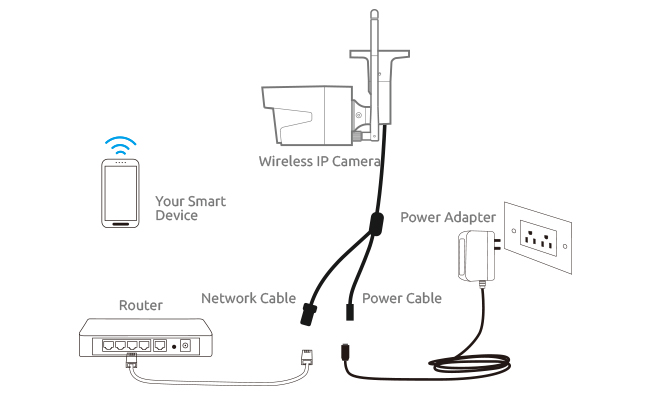
- Wireless IP camera connection diagram:
Do not forget that the view recorder and the monitor require a good power supply. You may as well create their specific sockets or connect them to the same power sources for the cameras.
In addition, you must also think when there is a sudden power outage. This is also when intruders attempt to cut the power supply in your home. Also, ensure that the home security system is connected with a generator. This way, it can work on a consistent basis or even under such circumstances.
Step 5. Set Up Your Self-Installed Security Camera (System)
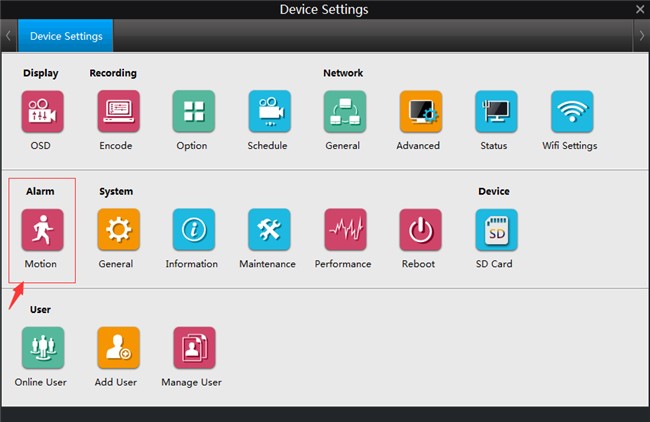
CCTV camera setup is the last procedure in a complete residential security camera installation do-it-yourself process. You'll want to access your video camera by smartphones, computers and tablets. Some self-install home CCTV camera manufacturers offer app and desktop software, for accessing your camera wherever you are. Get these surveillance features set up on the app/client, including live view, motion detection, video recording, zoom in/out, and more to suit your needs.
For Reolink PoE and wireless surveillance cameras and systems, you've got to set motion detection sensitivity and specific motion detecting zones to get accurate alerts on its free Reolink App and Client. Emails and push notifications will be sent to you once a home break-in or anything unexpected is happening.
One last thing, before you can say that your installation job is done, it is recommended for you to recheck the views of each camera. Check whether the cameras are moving or are recording. Also, check how far the camera can cover.
Conclusion of Indoor/Outdoor Surveillance Cameras Installation & Setup
Setting up a home video surveillance system can be a both fun and easy experience. Always keep in mind that there are lots of home security systems with cameras to choose from, and also many online home security stores, such as Walmart, Best Buy, and Amazon. Start installing a simple home security camera by choosing one designed for DIY users. Read home security system reviews for reference, and choose the best DIY security cameras/systems in Australia, South Africa, Canada, US.
Reolink PoE and 2.4/5 GHz WiFi cameras half the installation process. So you don't need to hire professional installers to do the setup, even if you are not confident of your skills in the installation of surveillance systems. You don't need to ask for installation and setup instructions from manufacturers. Even if you do, Reolink 24/6 1-to-1 support brings much convenience.
Reolink RLC-410
PoE Bullet IP Security Camera with Audio
5MP/4MP Super HD; Outdoor/Indoor Protection; 100ft Infrared Night Vision; Audio Recording; Mobile Remote Access & Control.
Bonus: Should You Install CCTV Cameras at Home on Your Own or Leave It to an Installer
Can't decide whether you should install security camera systems at home by yourselves or call an installation company?
If you don't want to drill holes to run the wires on your own, leaving the installation work to a pro looks like a good solution.
Check out how much you will spend on professional installation before you make up your mind.
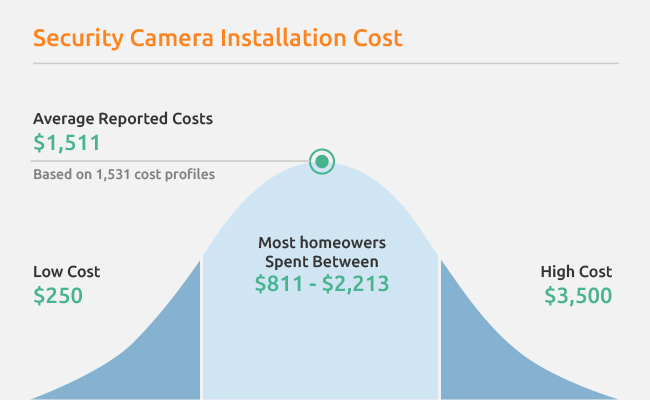
Generally speaking, if you ask a professional to do the installation job, they may charge you up to $3000 as installation fees for a whole set of security system at your home.
In some cases, the professional installer may even charge you extra activation fees to turn the surveillance equipment on.
However, if you decide to install security cameras at home on your own, the installation cost will be zero. Also, the CCTV installation process will go smoothly with the detailed guide above.
So, to reduce the unnecessary cost, it is best to choose DIY home surveillance systems and install on your own.
What's your story during the video surveillance system installation? Share with us your problems in mounting and setting up your CCTV camera, and let us make self-installing your own home camera system a less daunting thing together!


The best electronic security and surveillance products and services for home and offices.
Visit – https://reolink.com/shop/ Their skilled technicians and experienced engineers ensure that you get every possible support to achieve maximum system up-time and the best returns on your security investments.
Helping information . Thank You For This blog.